Power BI MCSA Certification Training Tips – Part 11: Connecting to Excel Data
To obtain your MCSA: BI Reporting you need to pass two exams: 70-778 (Analyzing and Visualizing Data with Power BI) and 70-779 (Analyzing and Visualizing Data with Excel). However, there is a huge overlap between the two exams resulting from the common BI features found in both Power BI and Excel: namely data modelling using the DAX language; and data connection and transformation using the M language.
We, at G Com Solutions, recommend to the clients to whom we supply Power BI Training that they prepare for both exams simultaneously and then sit both exams on the same day. We also run a 5 day Power BI MCSA Certification Prep course in London which includes both exams 70-778 and 70-779.
In this series of blog posts, we will be examining some of the key features of Power BI, Power Pivot and Power Query which you will need to master in order to pass the two exams.
In this topic, which applies only to exam 70-778, we discuss the options for connecting to Excel data from within Power BI.
Excel is the lowest common denominator when it comes to Power BI data sources; since, pretty much everyone will have some data stored in Excel for at least some of their projects.
Password Encrypted Workbooks
Be aware that, if you attempt to import data from a password encrypted workbook, you will receive an error which is far from helpful. The message implies that the workbook is corrupted in some way. However, as soon as you remove the password the import will work with no issues.

Worksheets, Tables and Name Ranges
Power BI recognizes three types of Excel data object: Worksheets, Tables and Named Ranges.
Worksheet Ranges
There is no need prep Excel data for import to Power BI, you can simply connect to any workbook and all of the worksheets it contains will be displayed. Simply click on the checkbox next to the worksheets which you want to import.
Excel Tables
There are four ways to create a table in Excel: Home > Format as Table, Insert > Table, Control-T and Control-L. When the Create Table dialog appears, make sure the checkbox next to the option My table has headers is activated.
<![if !vml]>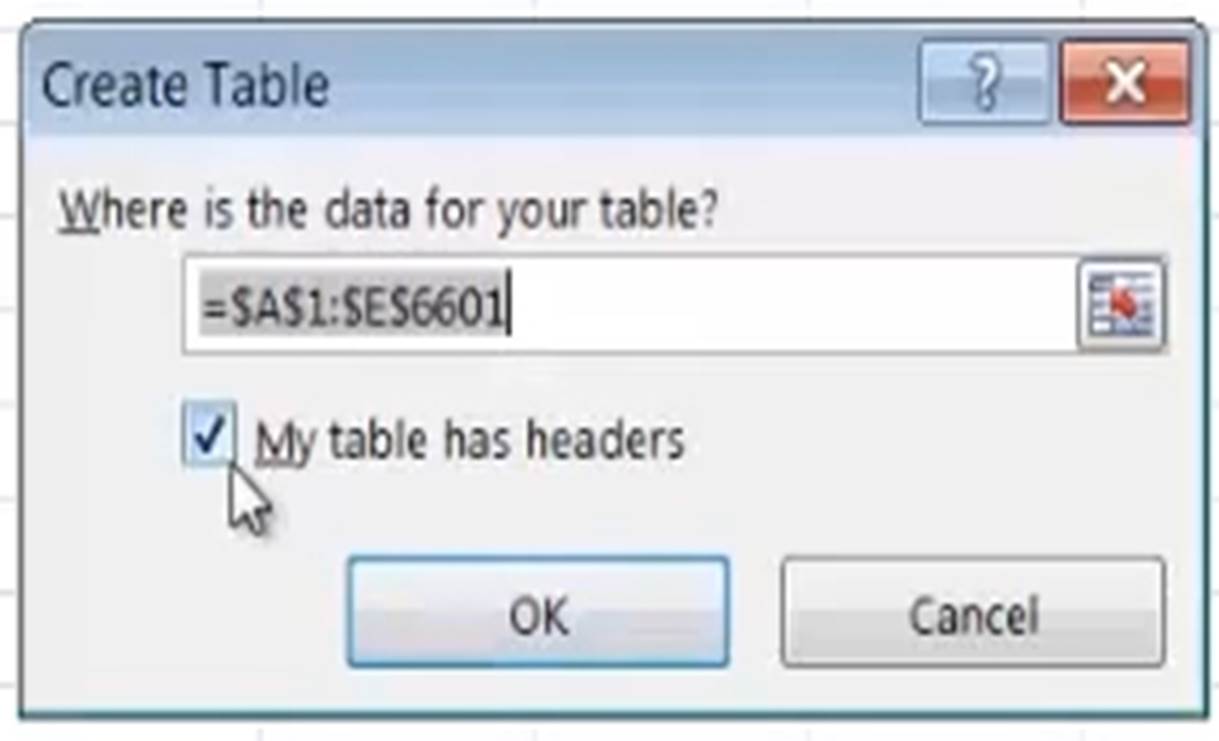 <![endif]>
It is also always a good idea to name the table, using Table Tools > Design > Table Name.
<![if !vml]>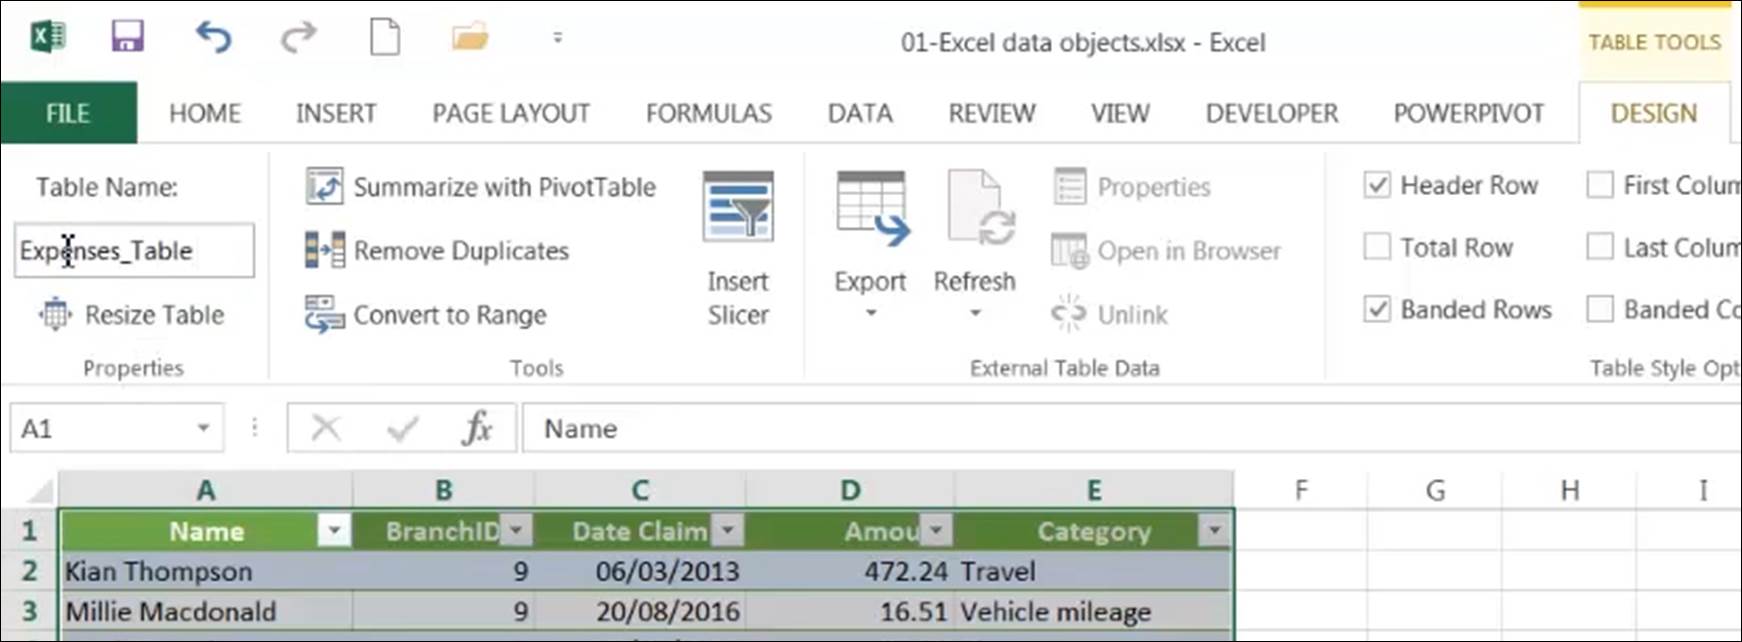 <![endif]>
Tables are very much the preferred format when importing Excel data into Power BI. So, if you’re optimizing Excel data for Power BI, you should definitely consider converting the data into the table. If you are importing Excel data into the Power BI service, you do not have a choice; you must convert the data to a table first. In Power BI Desktop, you have more flexibility.
Named Ranges
Named ranges are used to add clarity to Excel models, and this is especially the case when they are used in place of cell references in formulas.
To create a named range, first select all the data and then enter a name in the name box in the top left of the screen, parallel with the formula bar. (As with table names, no spaces are allowed in the name of a range.)
These, then, are the three types of object which Power BI Desktop will recognise: ordinary worksheet data, Excel tables and named ranges.
Recognizing the Icons
When importing Excel data, when the navigator appears, learn to recognize the icons representing the three object types. (See below.)
<![if !vml]>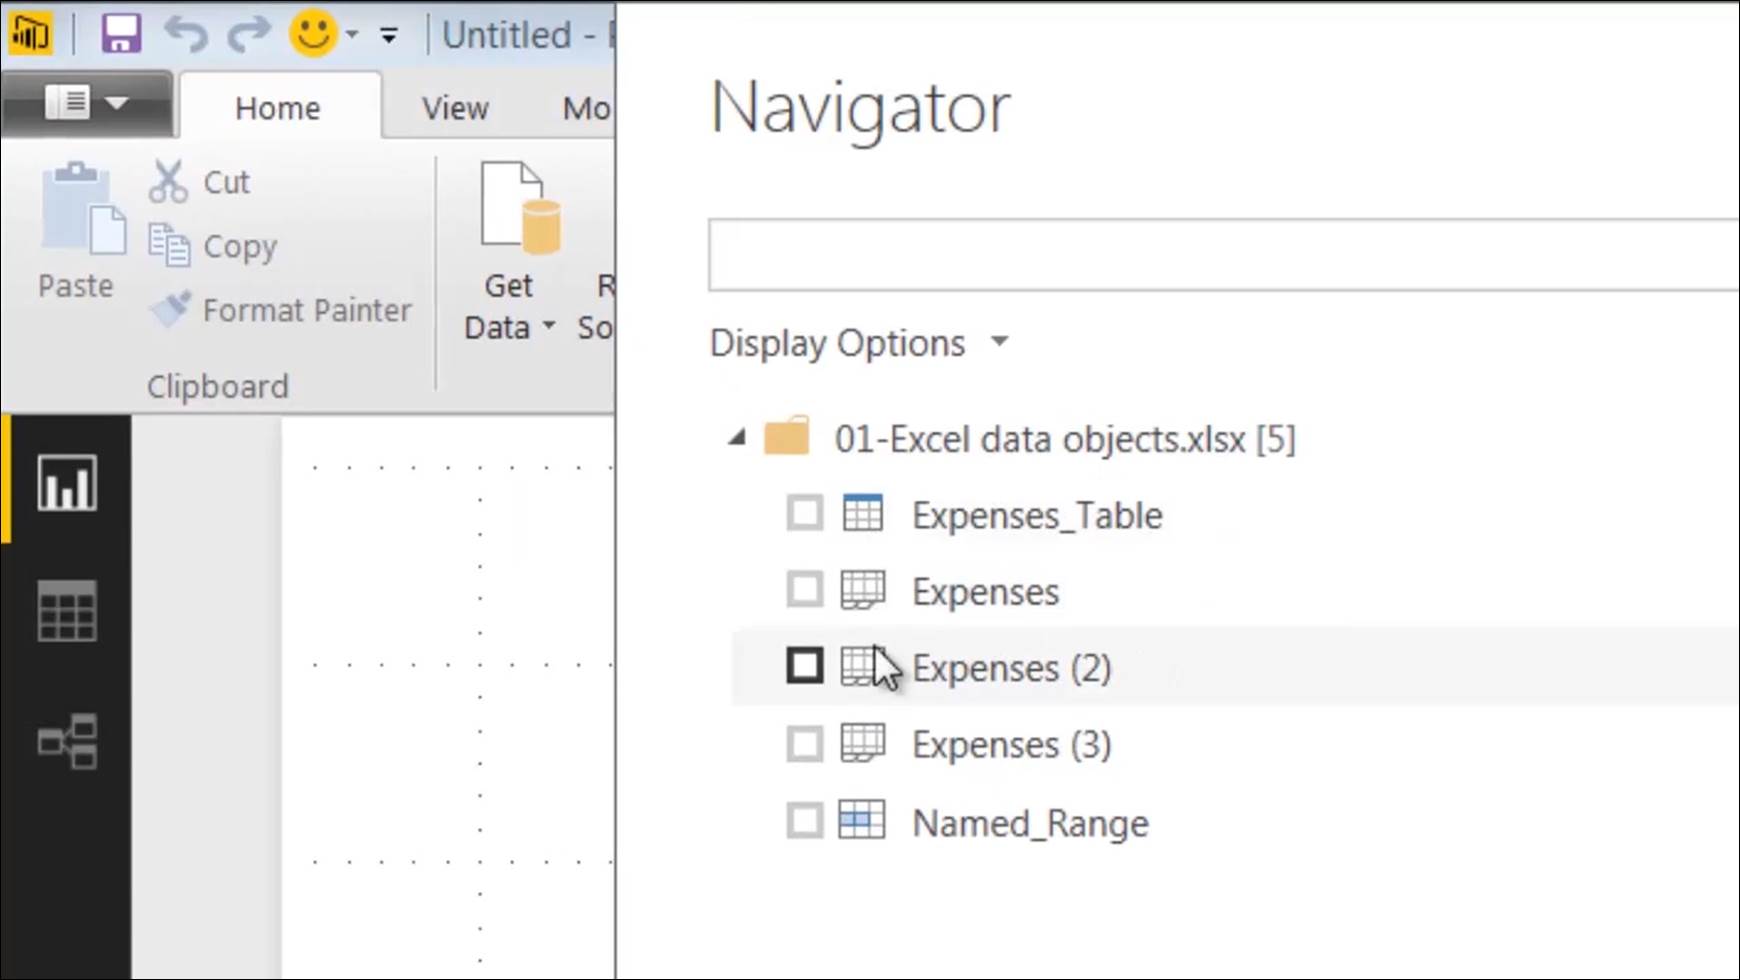 <![endif]>
Notice the three subtly different icons which are used to indicate tables, worksheets and named ranges:
<![if !supportLists]>· <![endif]>The table icon has a blue bar at the top.
<![if !supportLists]>· <![endif]>The worksheet icon has tiny sheet tabs in the bottom left.
<![if !supportLists]>· <![endif]>The named range icon has a light blue shading in the middle of the icon.
Data Integrity
If you connect to an Excel table, you normally get hundred percent accuracy in terms of column recognition. When you connect to raw worksheet data, you will sometimes find that Power BI recognizes blank columns which used to contain data but no longer do, as shown below.
<![if !vml]> <![endif]>
Naturally, all you need to do is to delete these extra columns. However, if you connect to an Excel table, this never occurs, since every column in a table must have a header.